


Hey there! I'm a supplier of wooden boxes, and I'm super excited to share with you how to make a wooden model box. Whether you're a DIY enthusiast or just looking to create a unique storage solution, making a wooden box can be a fun and rewarding project. So, let's dive right in!
Materials You'll Need
First things first, you'll need to gather all the necessary materials. Here's a list of what you'll need:
- Wood: You can choose from a variety of woods, such as pine, oak, or cedar. Pine is a popular choice because it's affordable and easy to work with. You'll need enough wood to cut the sides, bottom, and lid of your box.
- Saw: A handsaw or a power saw will do the trick. If you're using a power saw, make sure you follow all the safety precautions.
- Nails or Screws: You'll need nails or screws to hold the pieces of wood together. Make sure you choose the right size for your project.
- Hammer or Screwdriver: Depending on whether you're using nails or screws, you'll need a hammer or a screwdriver.
- Sandpaper: Sandpaper will help you smooth out the edges of the wood and give your box a professional finish.
- Wood Glue: Wood glue can be used to reinforce the joints and make your box more sturdy.
- Measuring Tape: A measuring tape is essential for getting accurate measurements.
- Pencil: You'll need a pencil to mark the wood before cutting.
Step 1: Measure and Cut the Wood
The first step in making a wooden model box is to measure and cut the wood. Use your measuring tape to measure the length, width, and height of the box you want to make. Then, use your pencil to mark the wood according to your measurements. Make sure you double-check your measurements before cutting to avoid any mistakes.
Once you've marked the wood, use your saw to cut the pieces. If you're using a handsaw, make sure you use a steady hand and follow the lines you've marked. If you're using a power saw, make sure you set the blade to the correct depth and follow the safety instructions.
Step 2: Assemble the Sides of the Box
After you've cut the pieces of wood, it's time to assemble the sides of the box. Start by applying a small amount of wood glue to the edges of the pieces that will be joined together. Then, use your nails or screws to attach the pieces. Make sure the corners are square and the joints are tight.
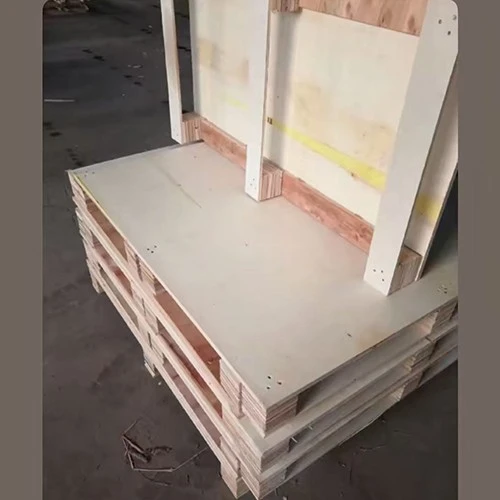

If you're using nails, use a hammer to drive the nails into the wood. Make sure the nails are long enough to hold the pieces together but not so long that they stick out the other side. If you're using screws, use a screwdriver to tighten the screws. Make sure the screws are tight but not over-tightened, as this can split the wood.
Step 3: Attach the Bottom of the Box
Once you've assembled the sides of the box, it's time to attach the bottom. Place the bottom piece of wood inside the box and align it with the edges of the sides. Apply a small amount of wood glue to the edges of the bottom piece and the inside of the sides. Then, use your nails or screws to attach the bottom to the sides.
Make sure the bottom is flush with the edges of the sides and the joints are tight. You can use a clamp to hold the pieces together while the glue dries.
Step 4: Make the Lid
The next step is to make the lid for your box. Measure and cut a piece of wood that is slightly larger than the top of the box. You can use the same wood as the sides and bottom of the box or choose a different type of wood for a contrasting look.
Once you've cut the lid, sand the edges to make them smooth. You can also add a handle to the lid for easy opening and closing. You can purchase a handle from a hardware store or make your own using a piece of wood or metal.
Step 5: Sand and Finish the Box
After you've assembled the box and made the lid, it's time to sand and finish the box. Use sandpaper to smooth out the edges of the wood and remove any rough spots. Start with a coarse-grit sandpaper and then move on to a finer-grit sandpaper for a smoother finish.
Once you've sanded the box, you can apply a finish to protect the wood and give it a nice look. You can choose from a variety of finishes, such as paint, stain, or varnish. Make sure you follow the instructions on the finish product and apply it in a well-ventilated area.
Step 6: Add Personal Touches
Now that your box is complete, you can add some personal touches to make it unique. You can paint or stain the box in your favorite colors, add decals or stickers, or engrave a message on the lid. You can also line the inside of the box with fabric or felt to protect the contents.
Conclusion
Making a wooden model box is a fun and rewarding project that anyone can do. With a little bit of time and effort, you can create a beautiful and functional box that you'll be proud to show off. Whether you're using it to store jewelry, keepsakes, or other small items, a wooden box is a great way to add a touch of style to your home.
If you're interested in purchasing high-quality wooden boxes for your business or personal use, check out our Wooden Crate Packaging, Timber Keepsake Box, and White Wooden Crate Box options. We offer a wide range of wooden boxes in different sizes, styles, and finishes to meet your needs.
If you have any questions or would like to discuss your specific requirements, feel free to reach out to us. We're here to help you find the perfect wooden box solution for your project.
References
- Woodworking for Beginners: A Step-by-Step Guide
- DIY Wooden Box Projects: Ideas and Inspiration
- The Complete Guide to Wood Finishes


